.png)
Why use Scheduling
The Scheduling tool lets you create and manage upcoming meetings, lessons, or events directly from Hiyve. It integrates seamlessly with your calendar so you can plan sessions, invite participants, and keep everything organized in one place.
Use Scheduling to:
-
Plan ahead: Set up meetings or lessons in advance with clear start times and durations.
-
Send invites automatically: Share links with participants through integrated calendar events.
-
Avoid conflicts: Sync with Google, Outlook, or iCal to prevent double-booking.
-
Stay organized: View and manage all your upcoming sessions from one dashboard.
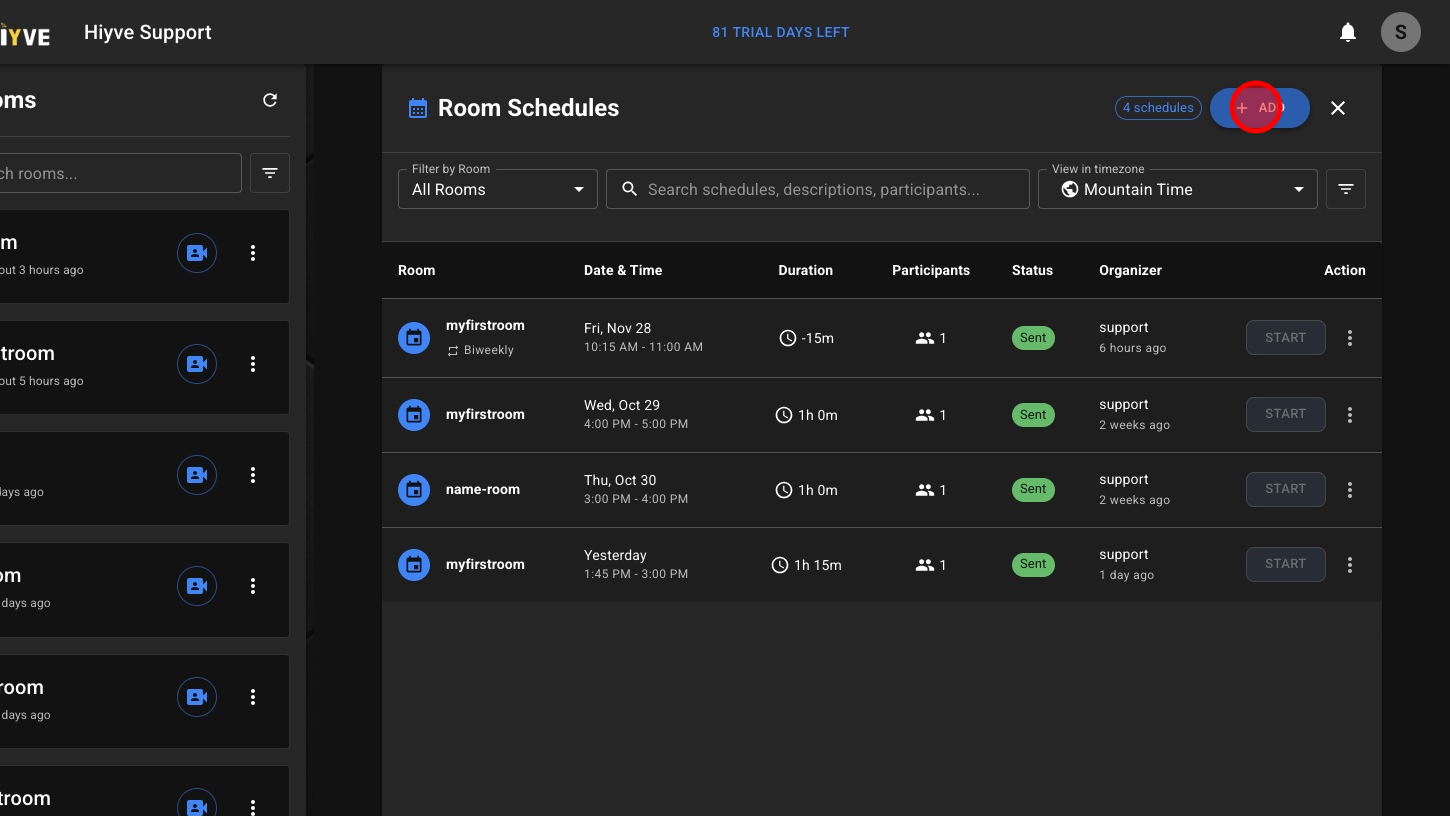
1. Click The 'Scheduling' Icon

2. Click The 'Add' button
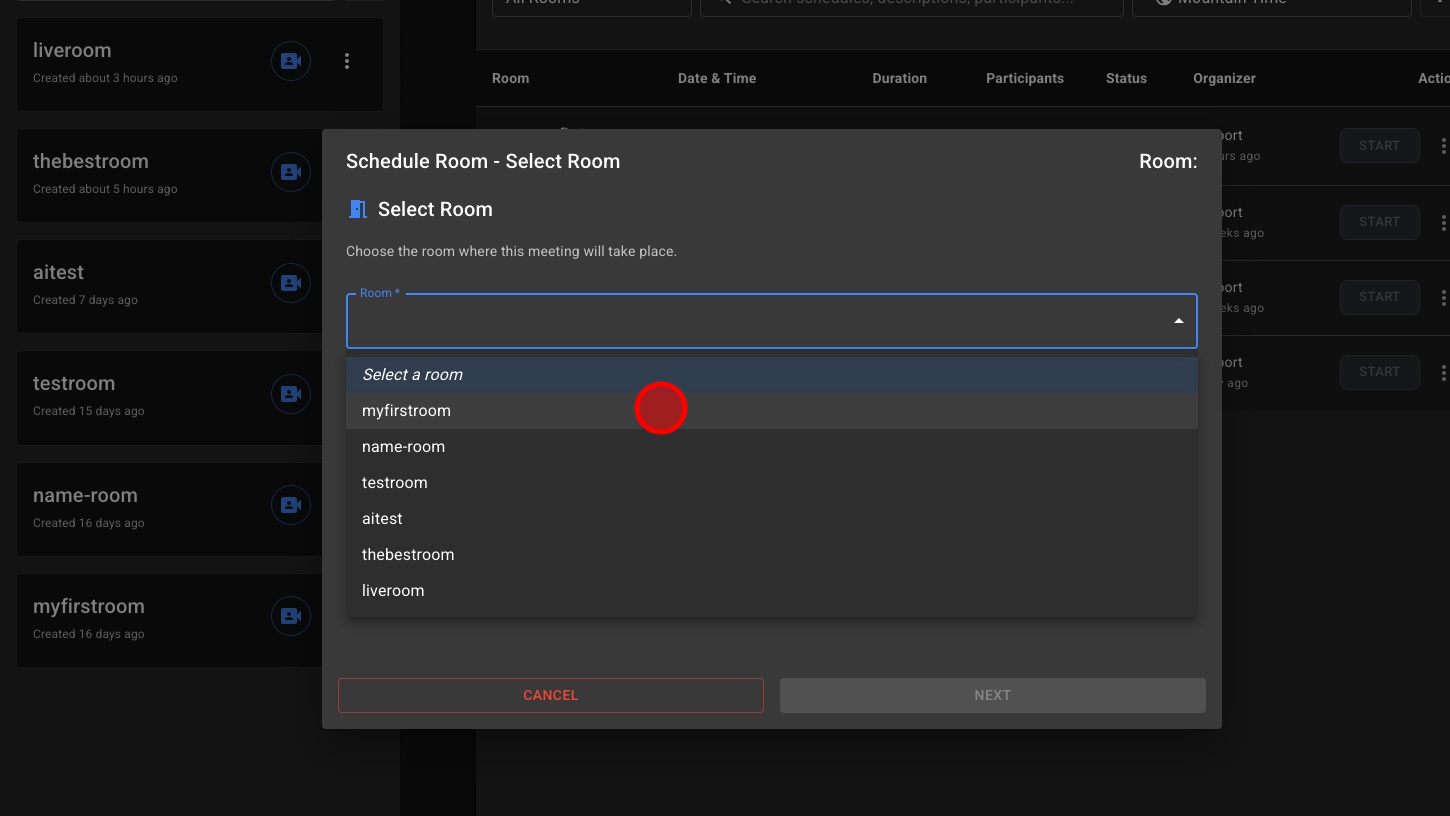
3. Select Which Room To Schedule For
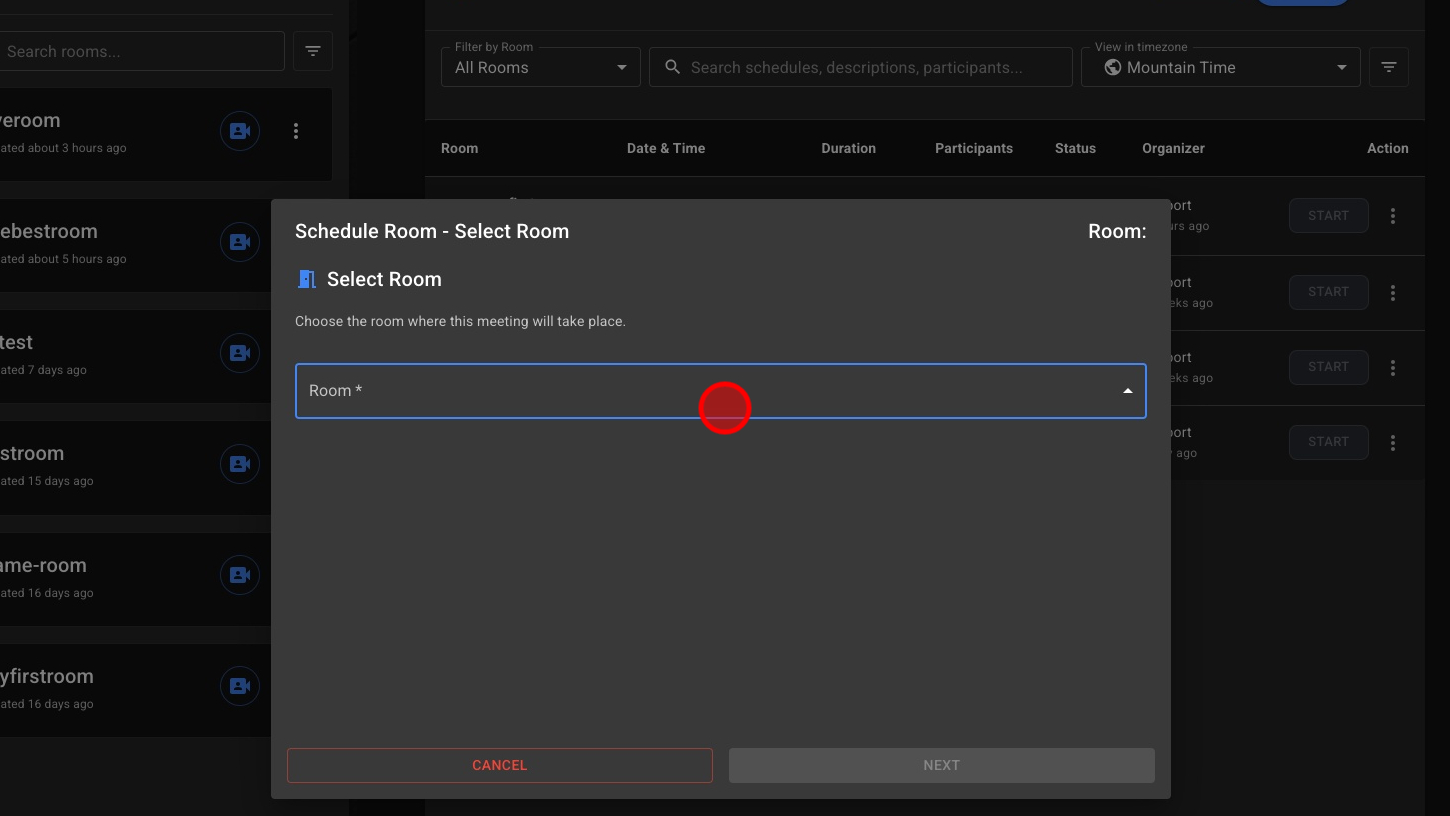
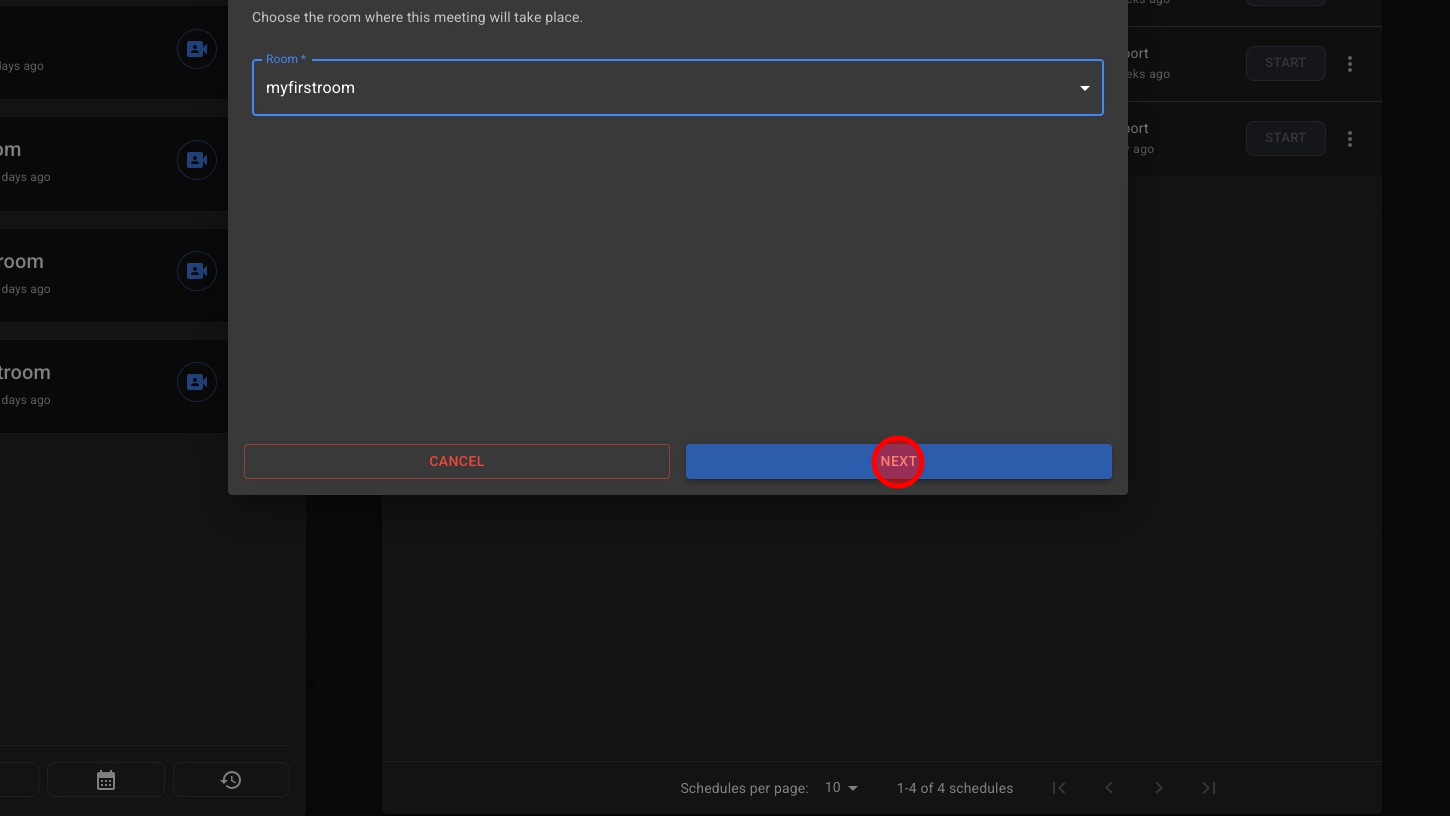
4. Select The Room
5. Click The 'Next' button
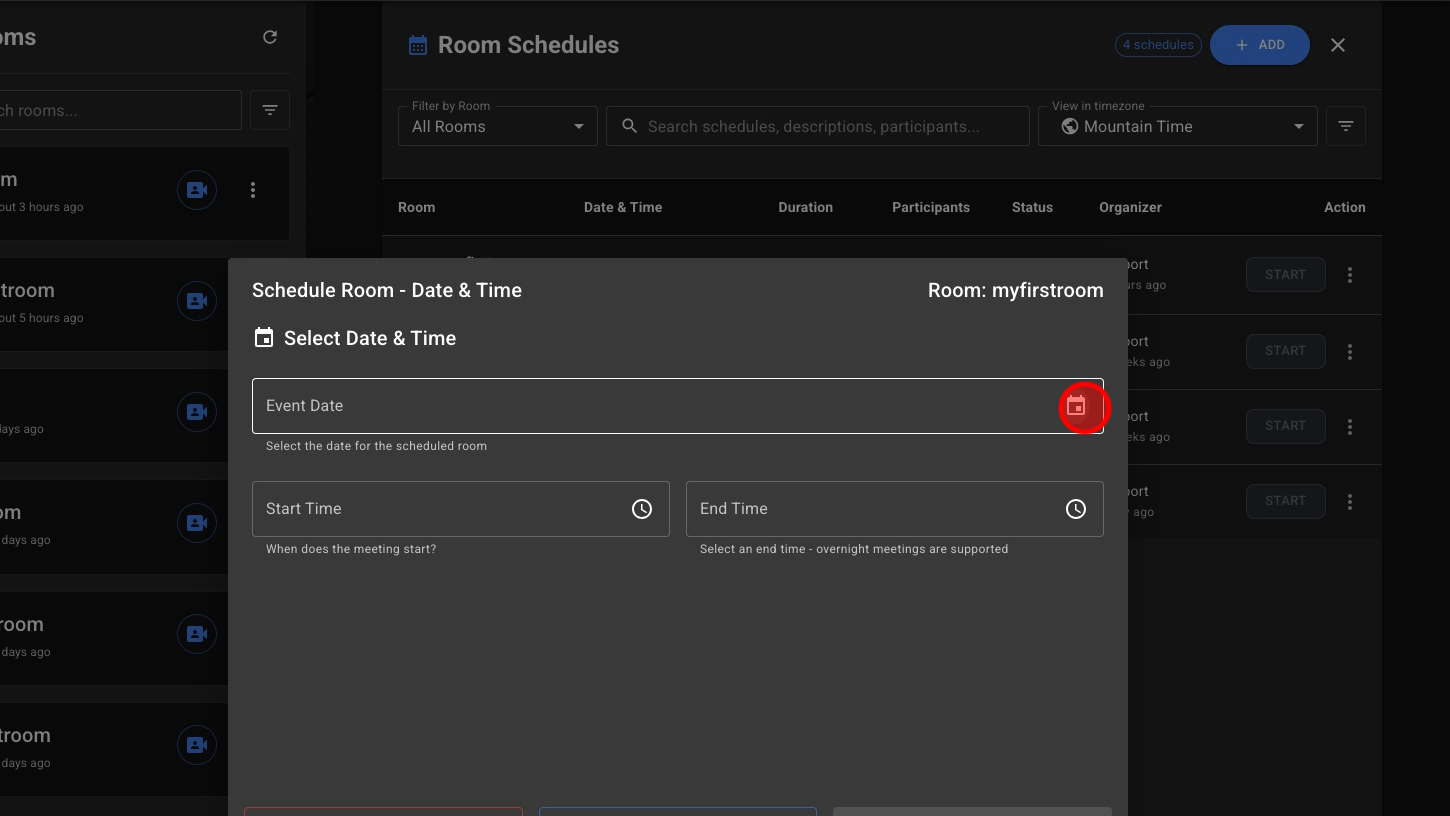
6. Click The 'Calendar' Icon
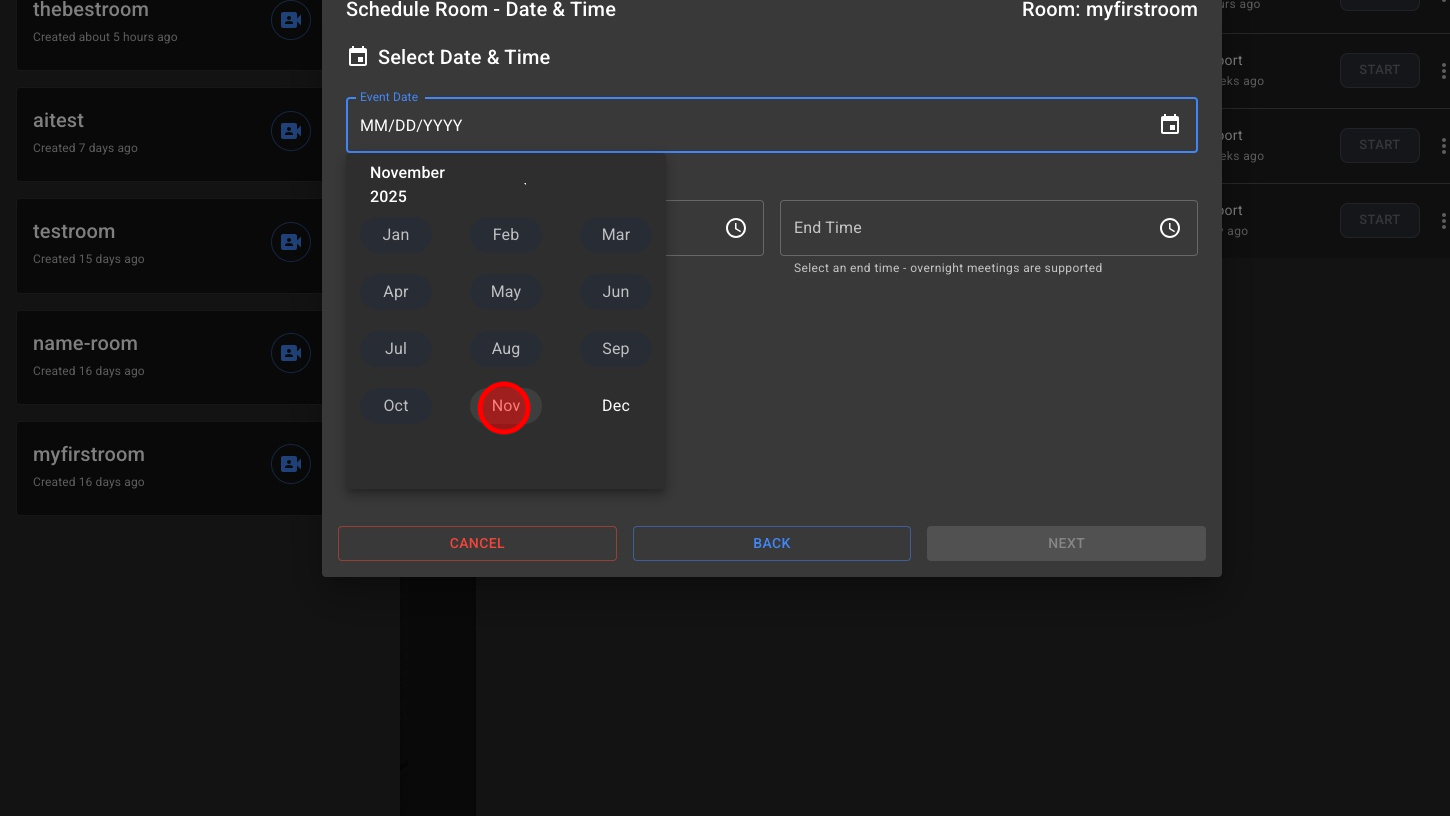
7. Select The Month
8. Select The Date

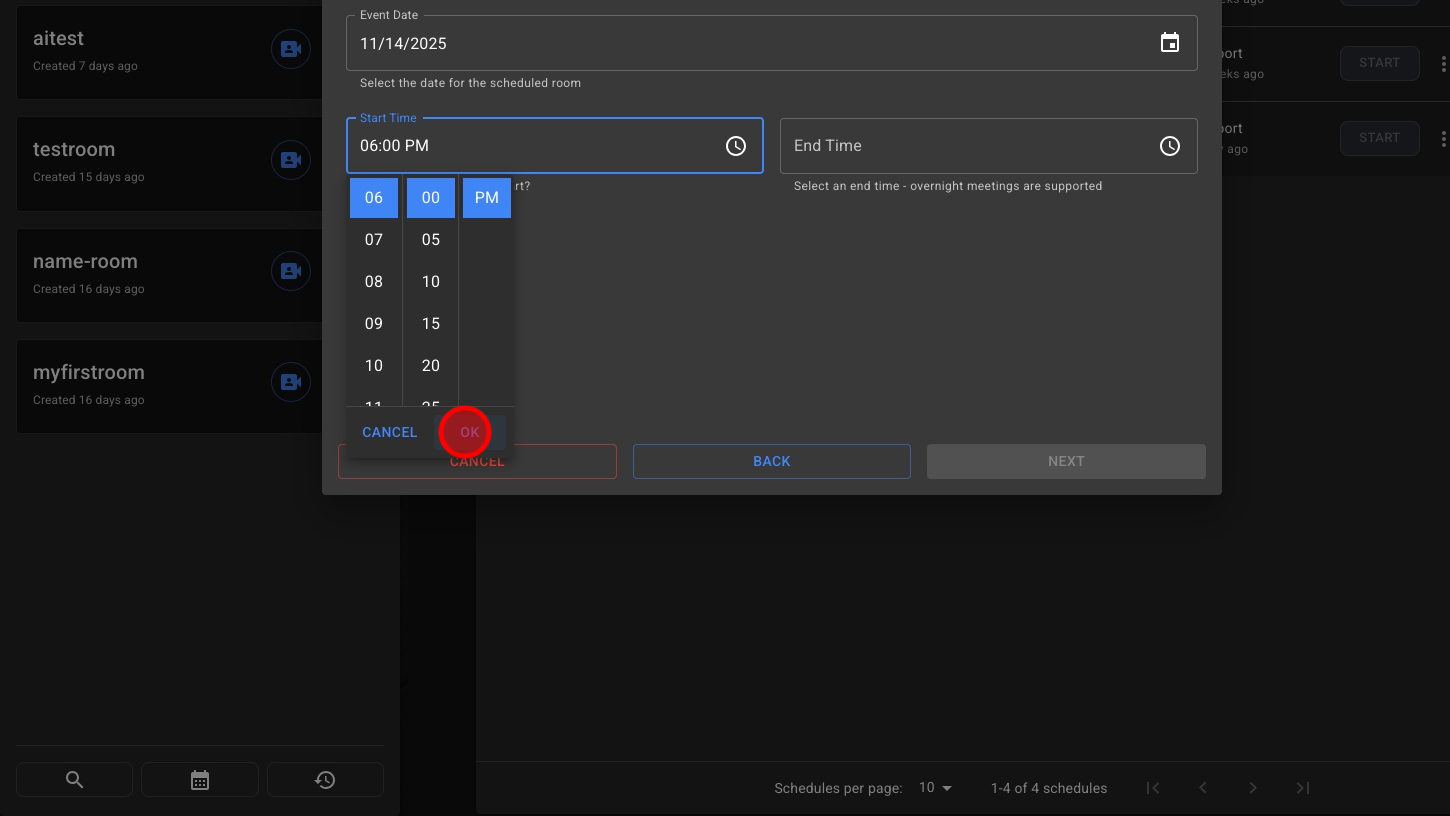
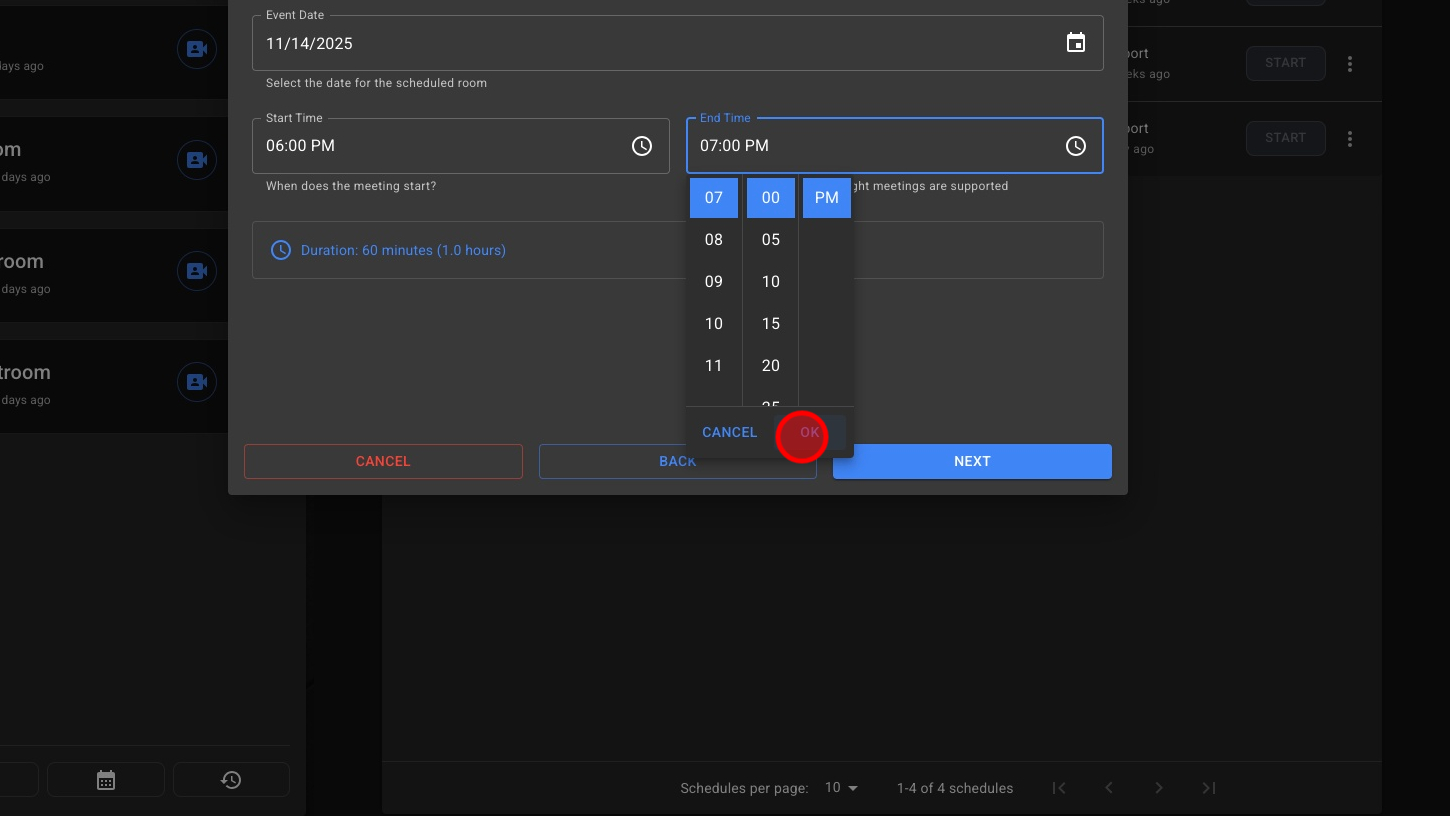
9. Select The Start Time

10. Click “Ok”
11. Select The “End Time”
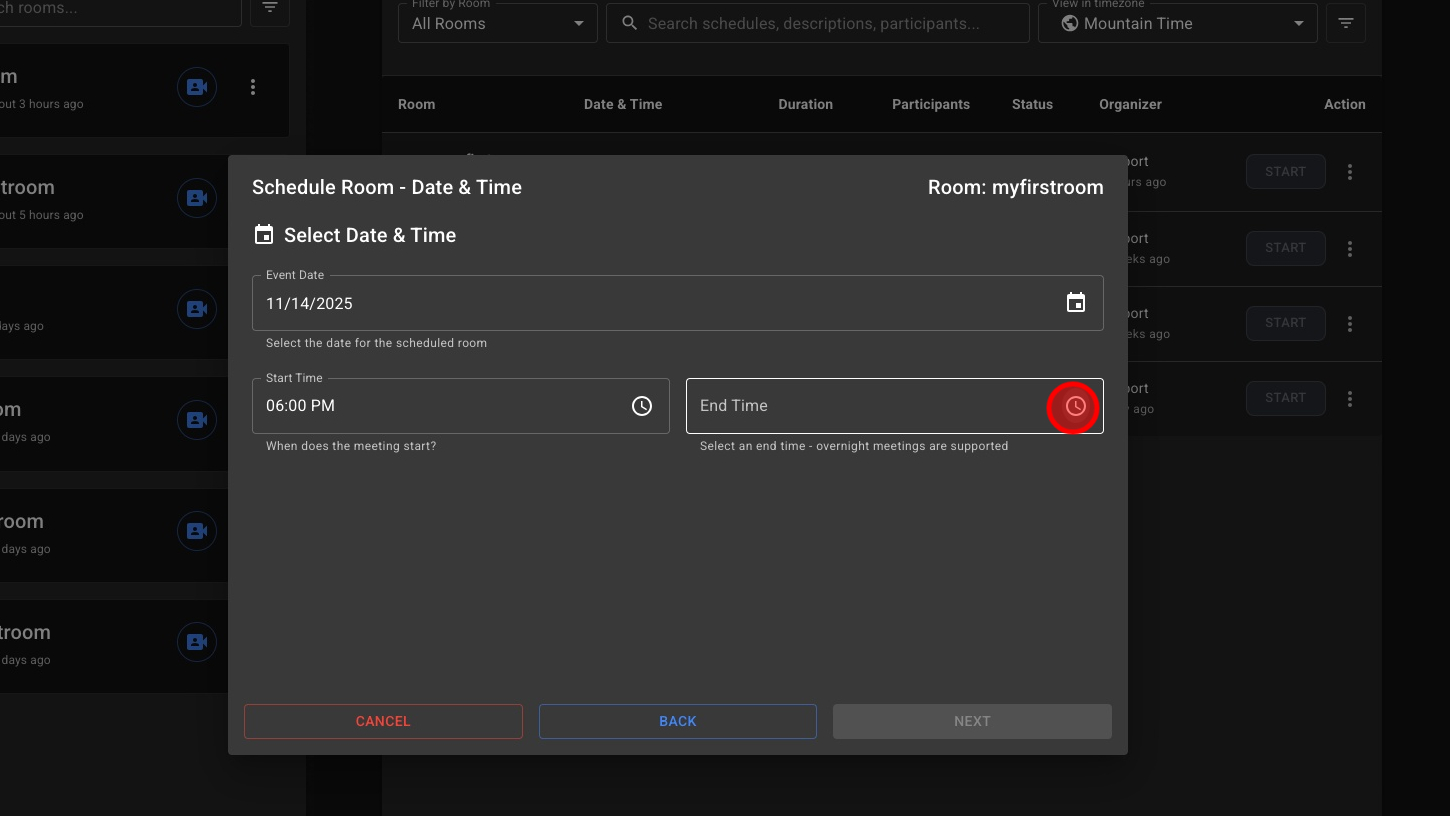
12. Click “Ok”
13. Click “Next”

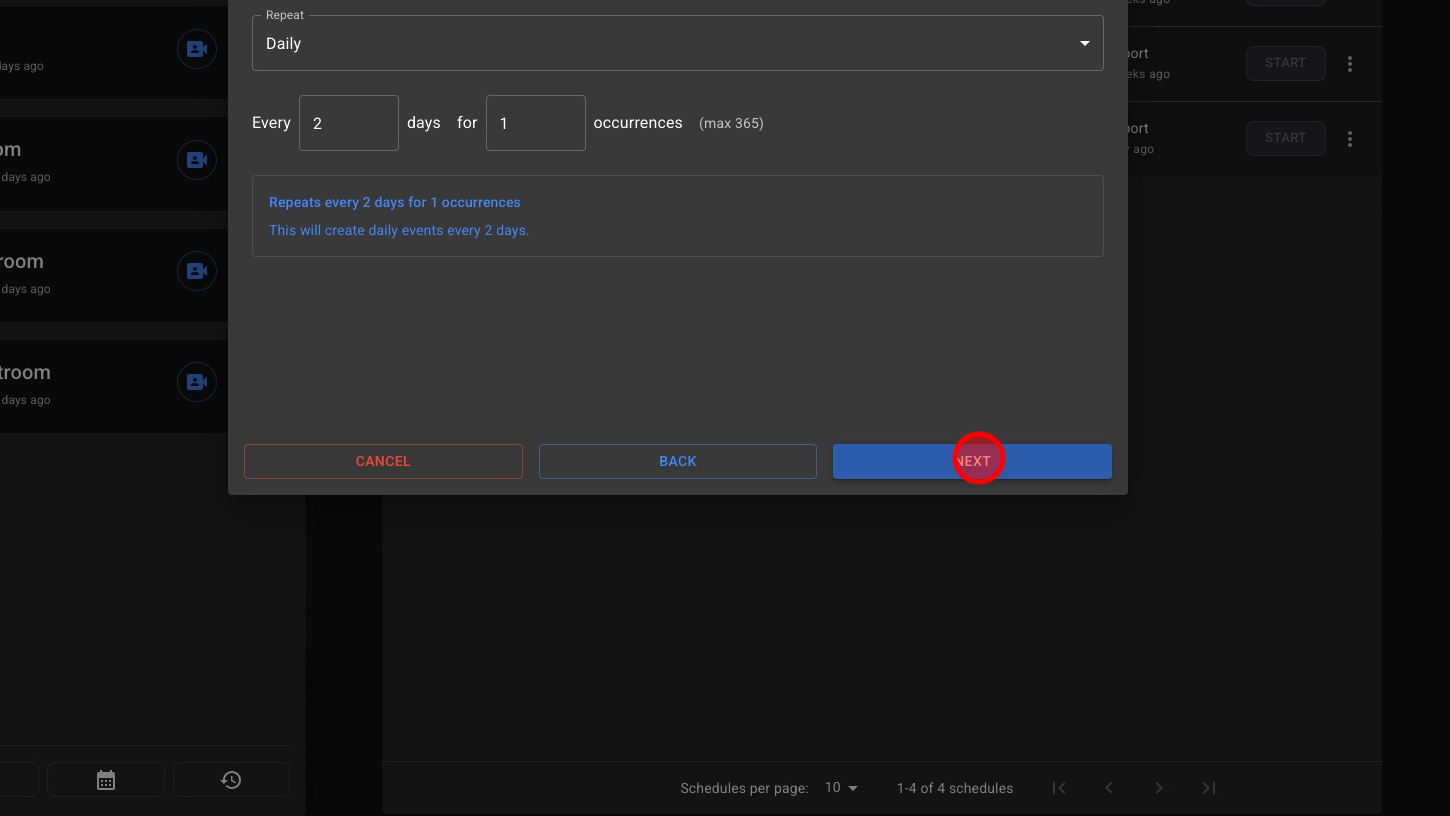
14. **Optional Set How Often This Event Repeats
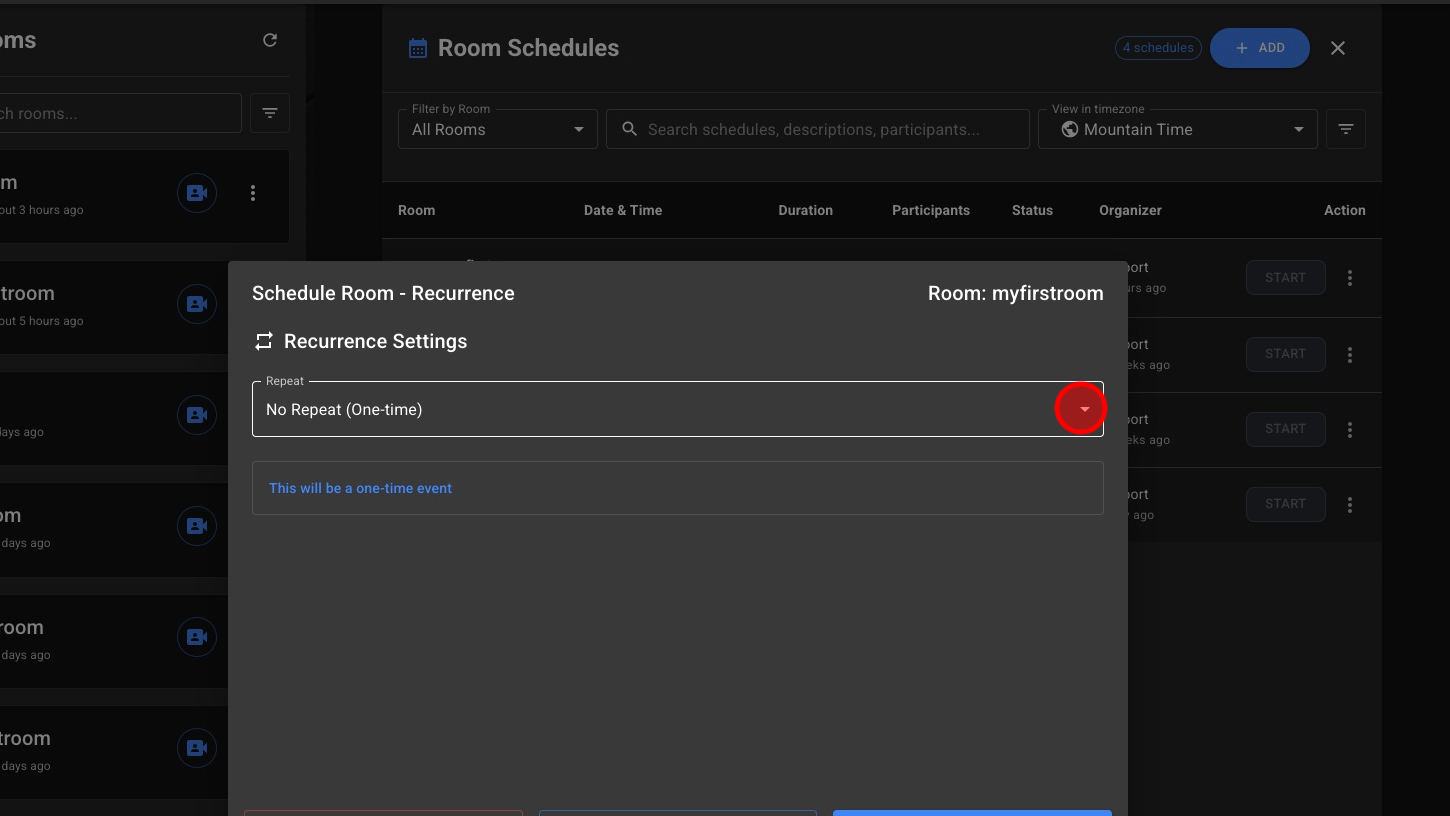
15. ** Pick Between: Daily, Weekly, Bi-weekly or Monthly

16. Choose How Often The Event Repeats
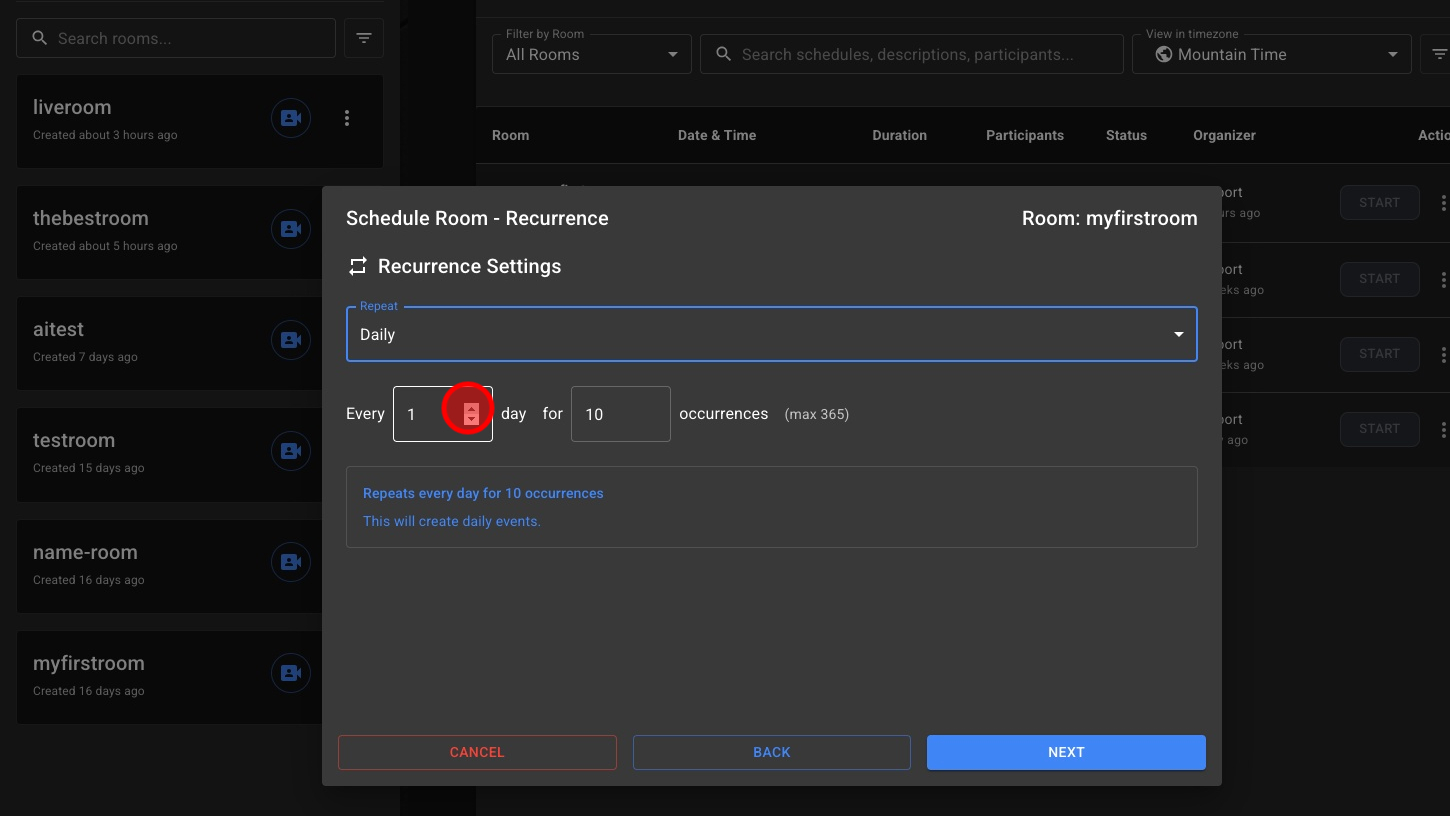
17. Choose The Number Of Repeats
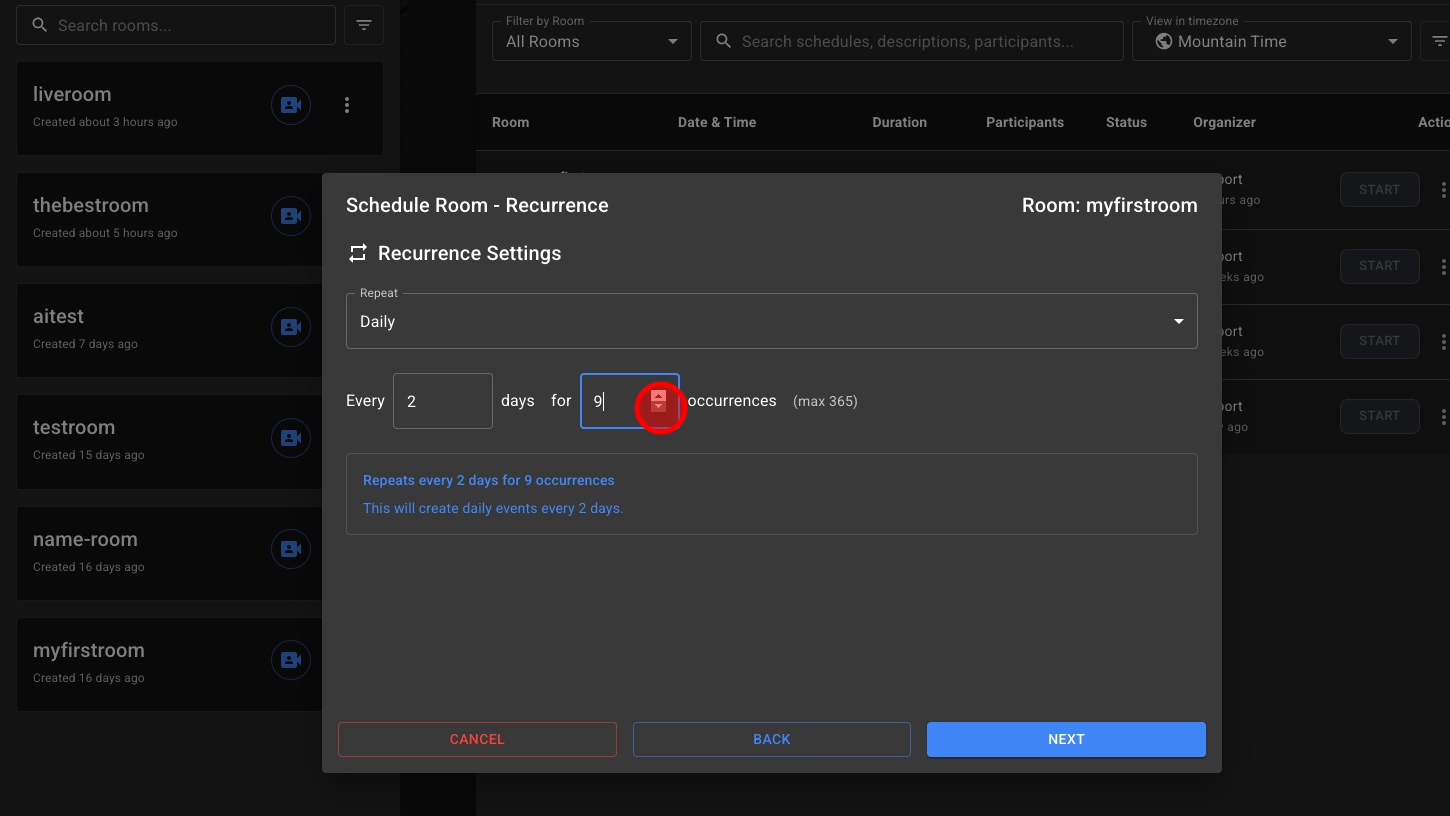
18. Click “Next” To Save Those Options
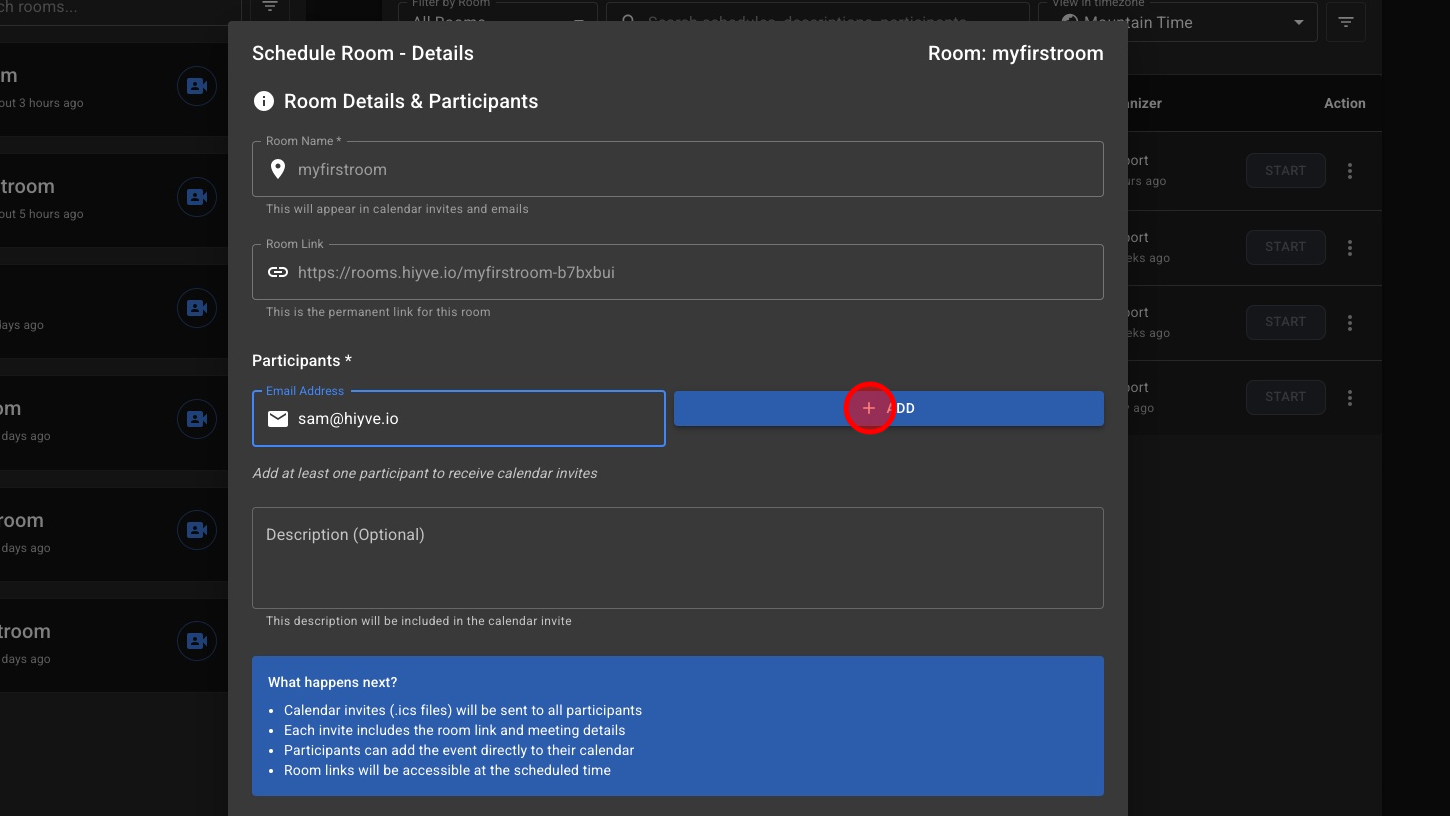
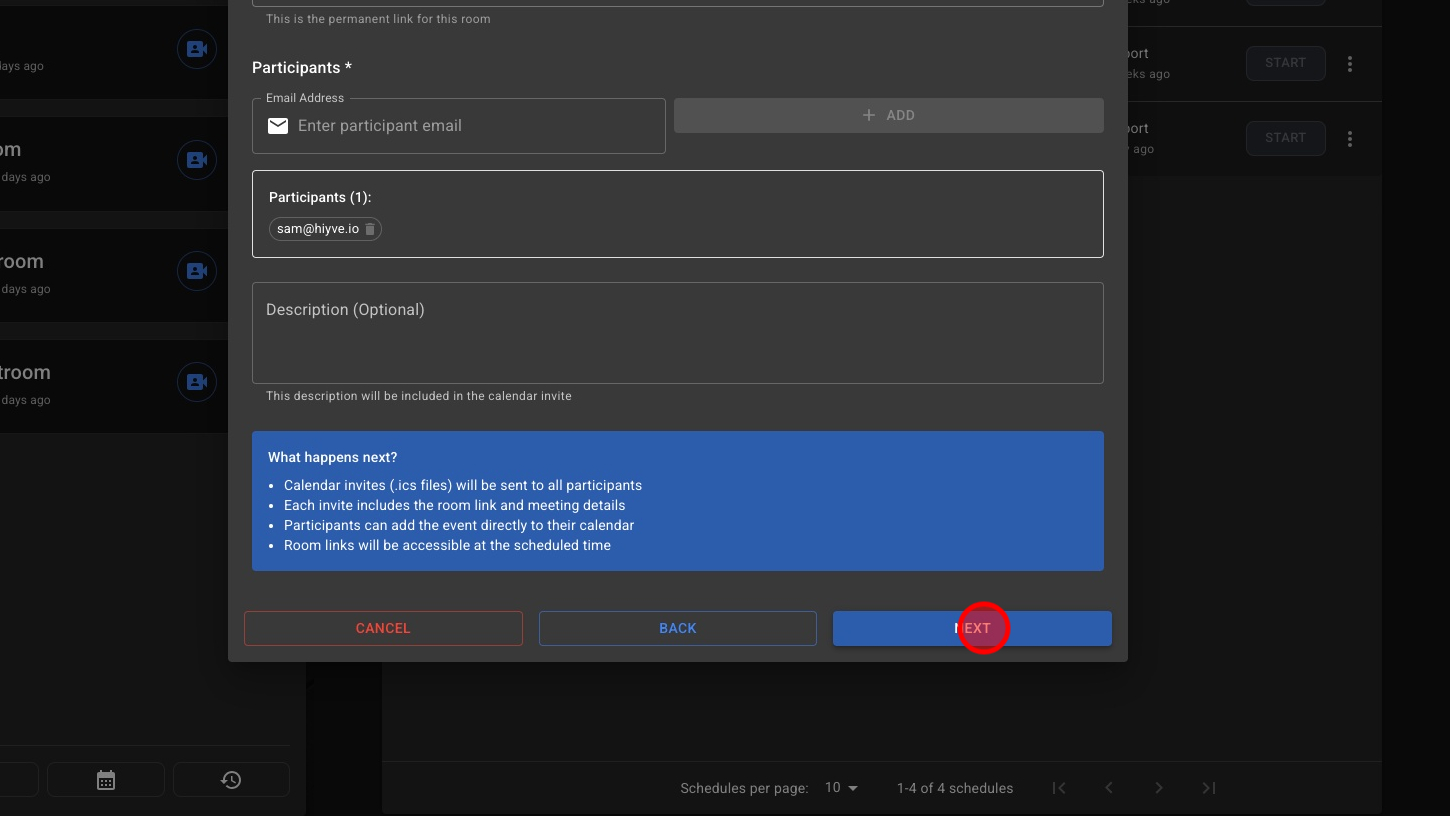
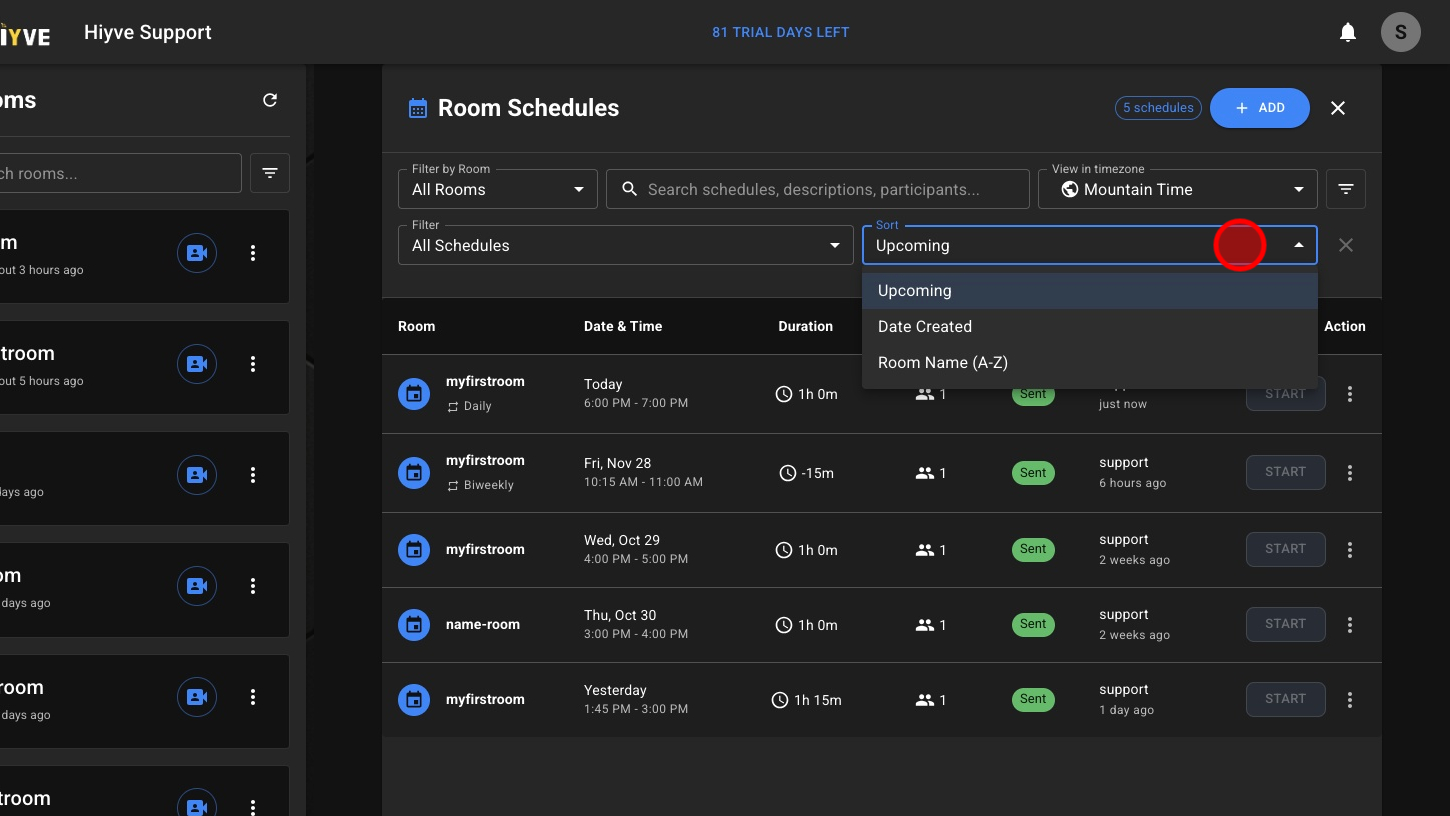
19. Enter Email Address For Guests

20. Click “Add”
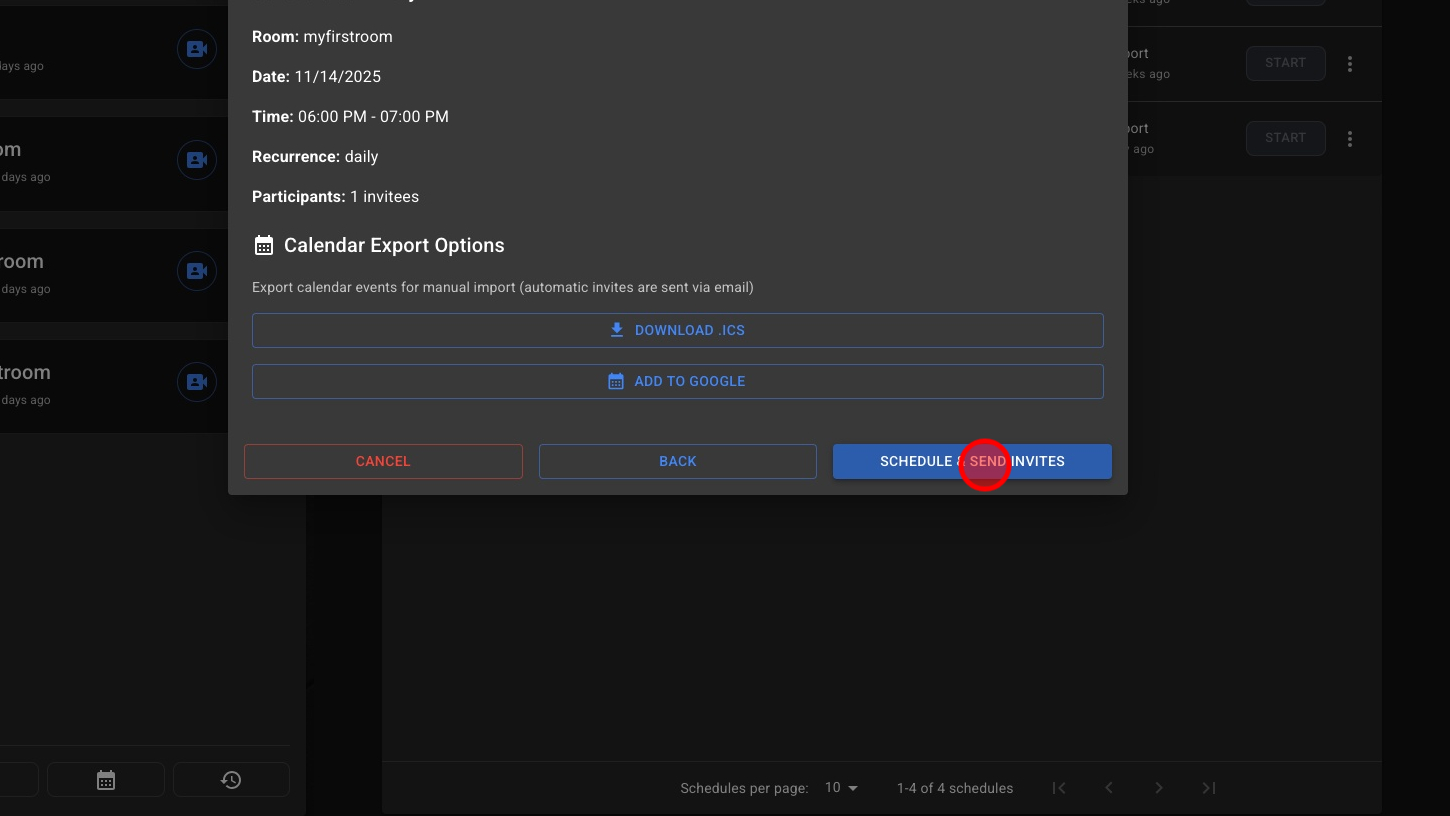
21. Click “Next” To Save Invites
22. Click “Add To Google” or “Download .ICS” For Other Calendars

23. Click The 'Send Invites' Button
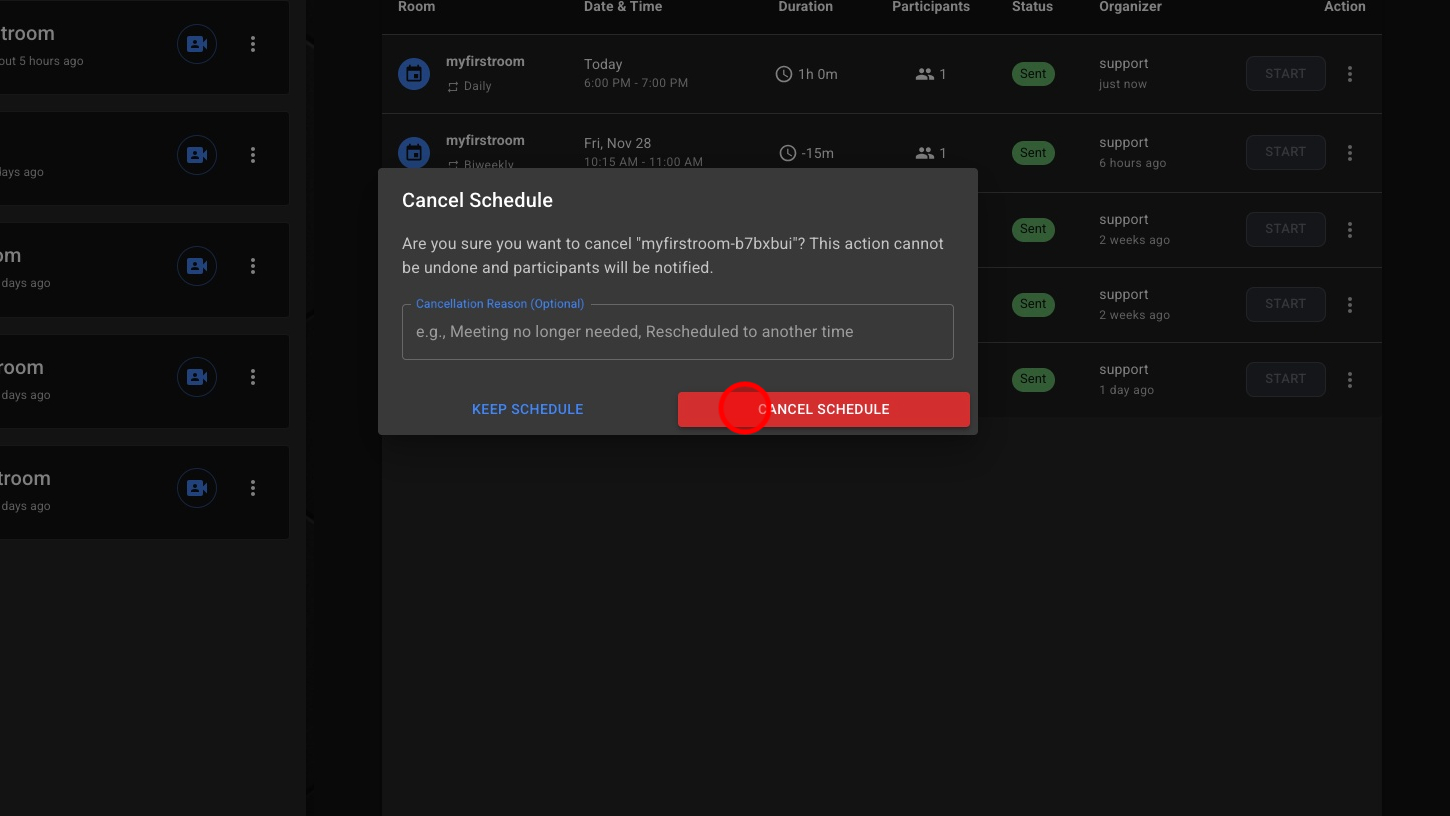
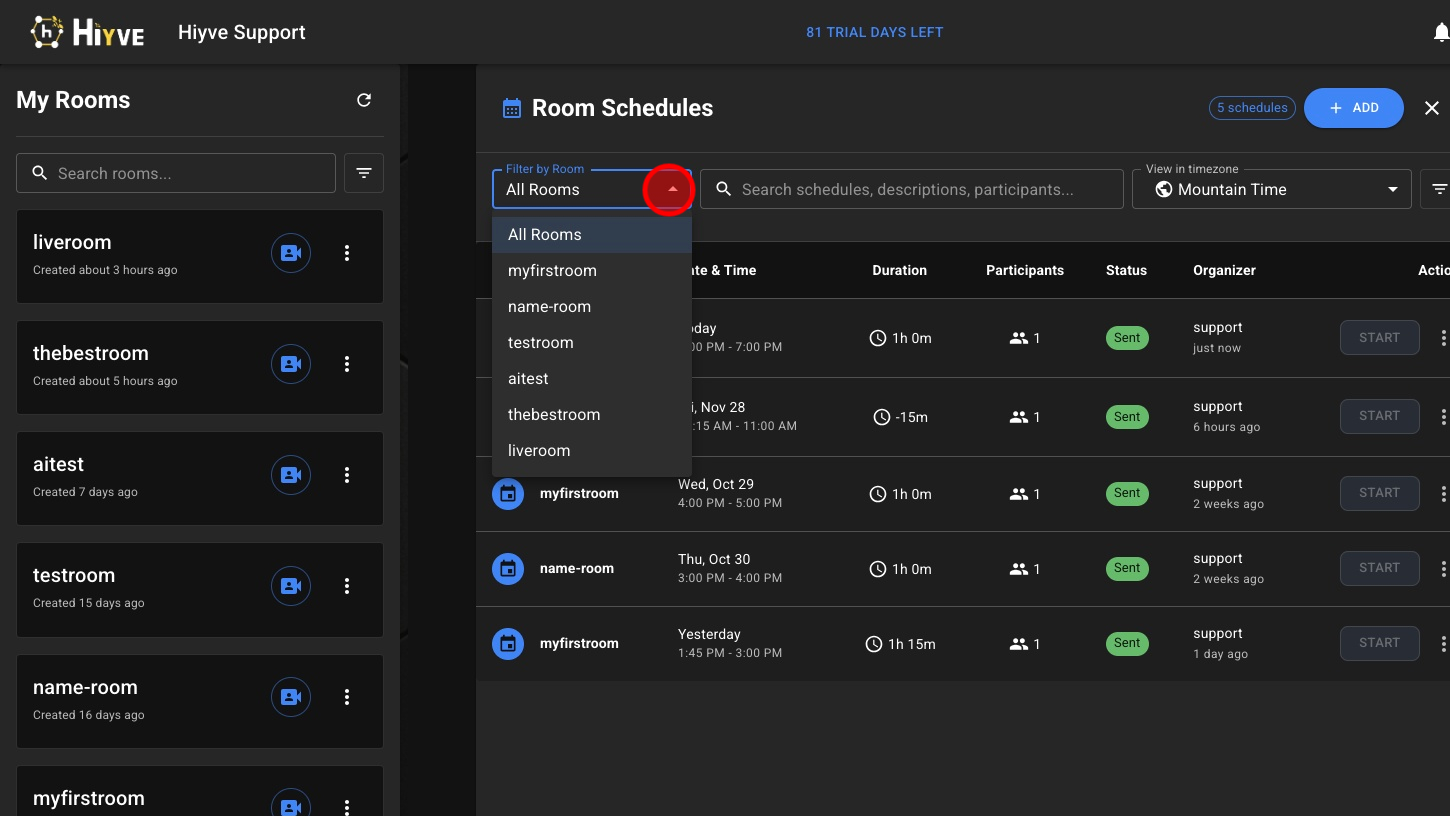
24. Filter Scheduled Rooms
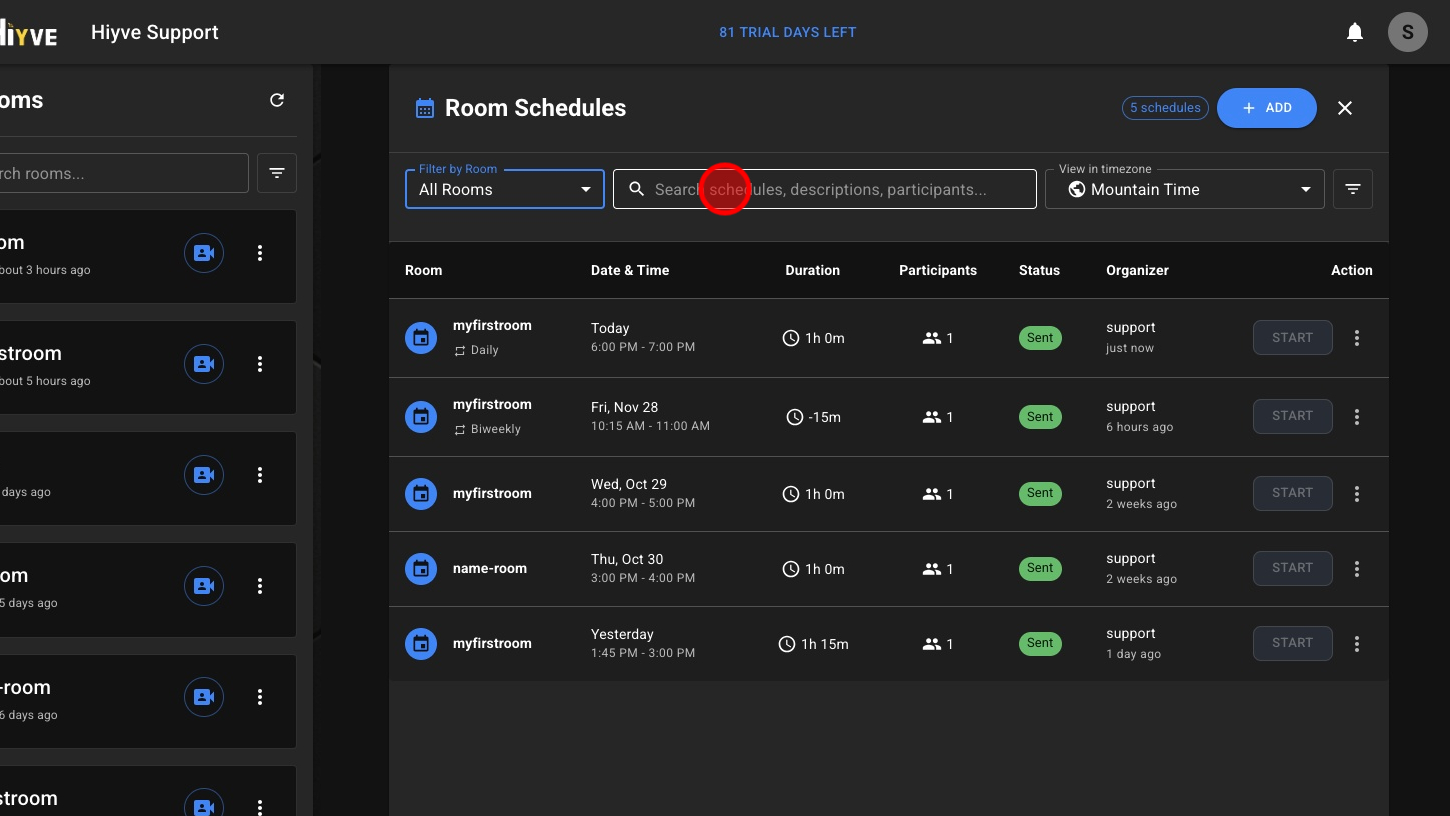
25. Search For Scheduled Events
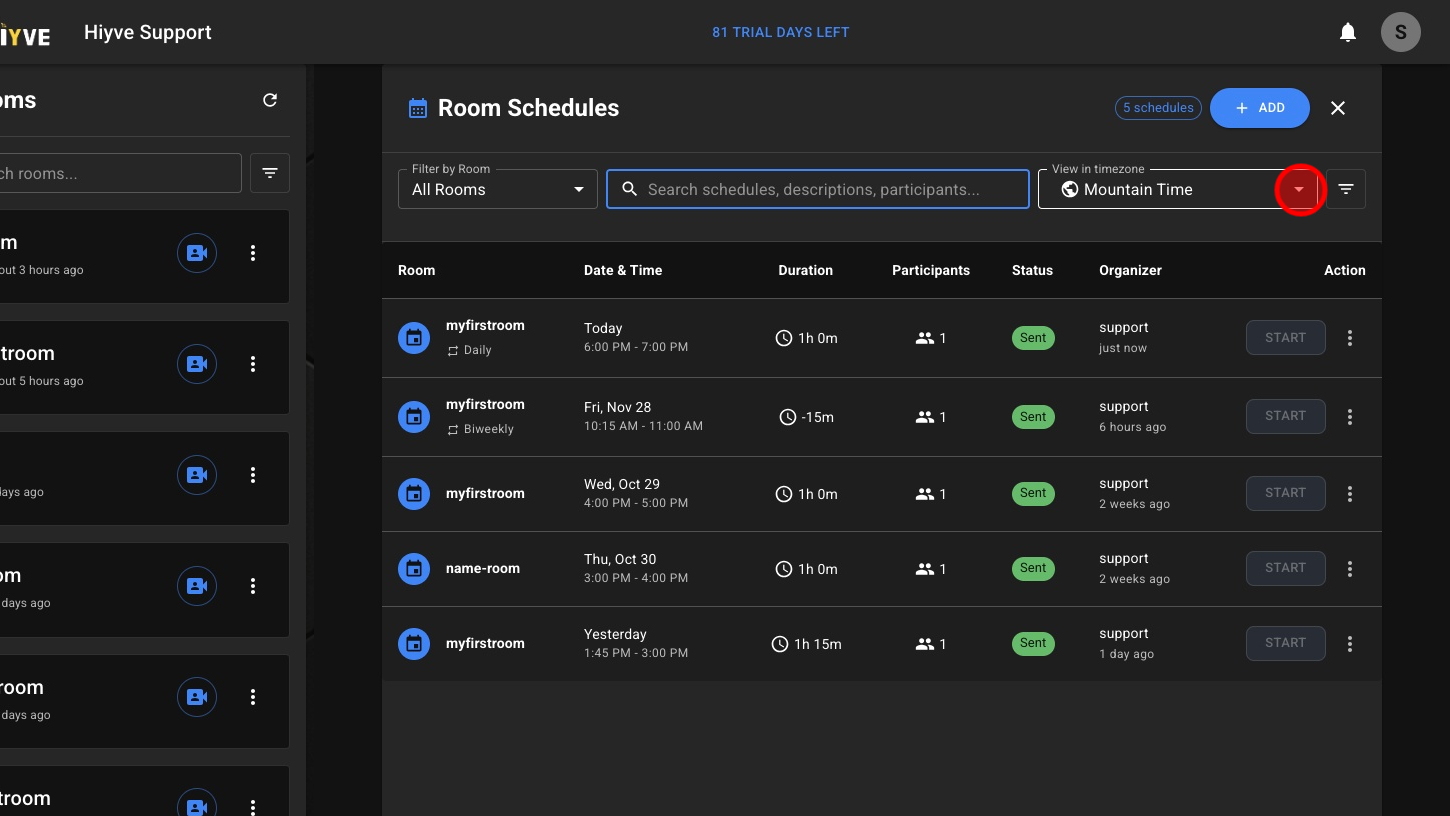
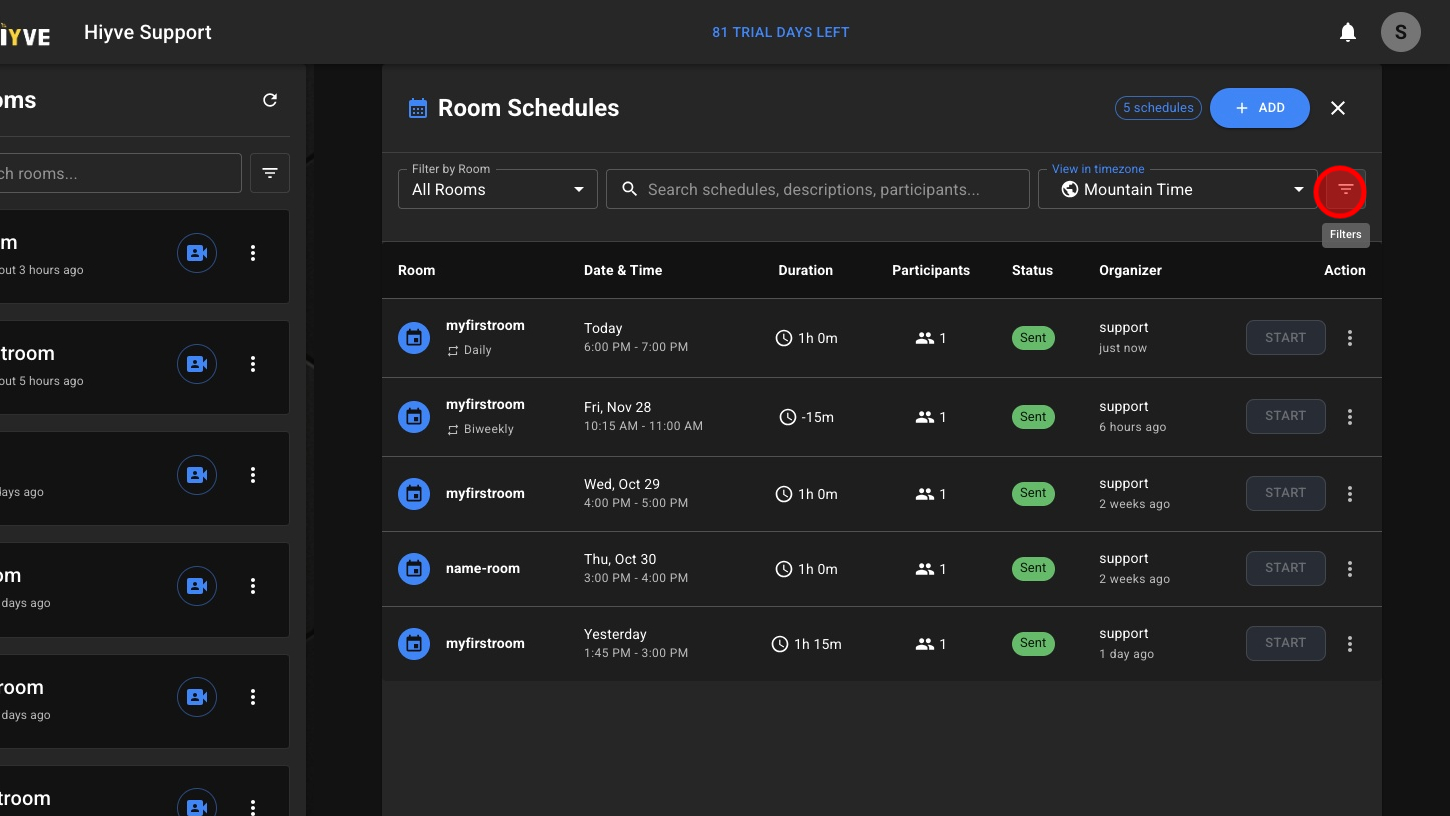
26. View Schedule In Different Time Zones
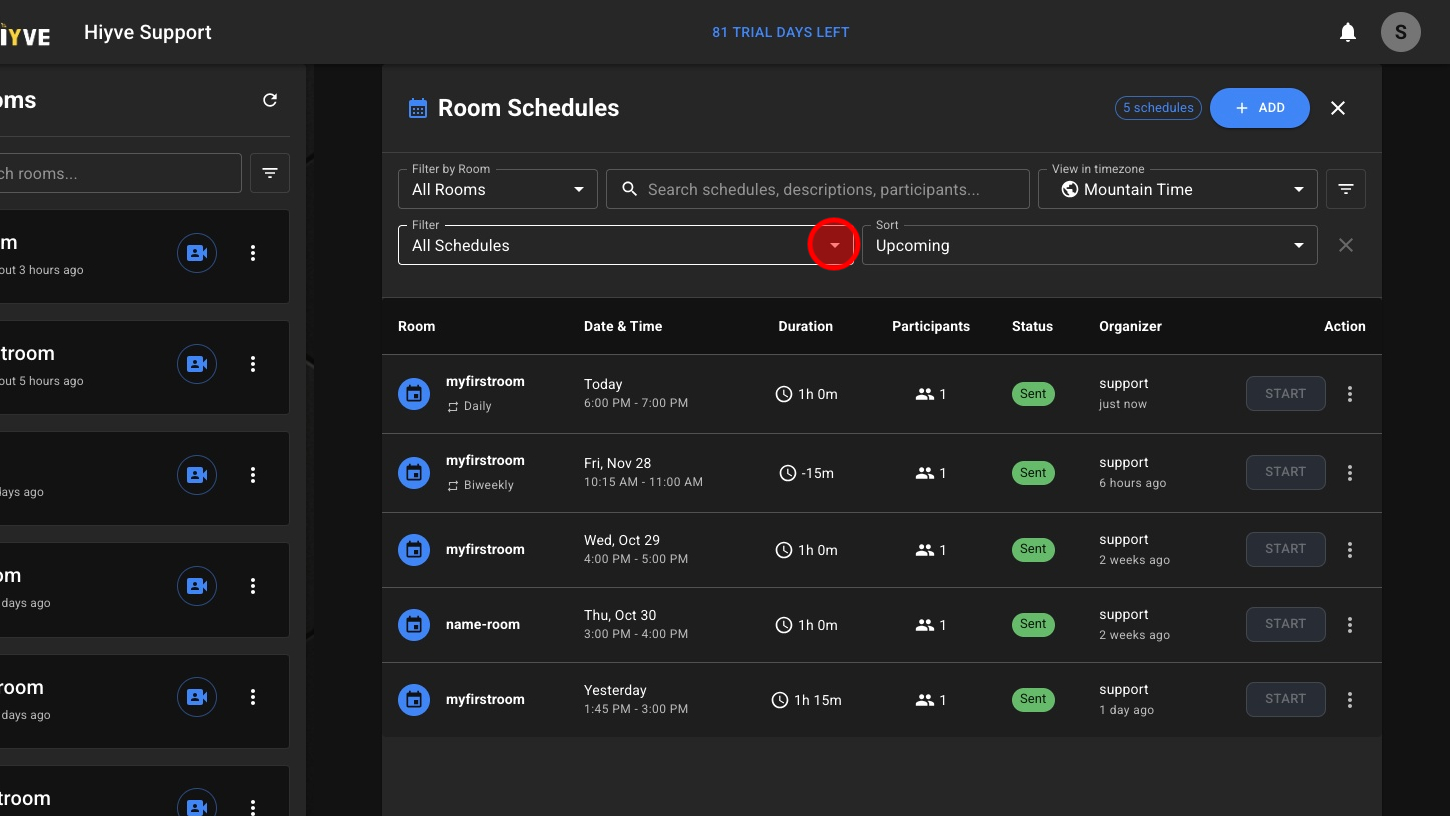
27. Show Filter & Sorting Options
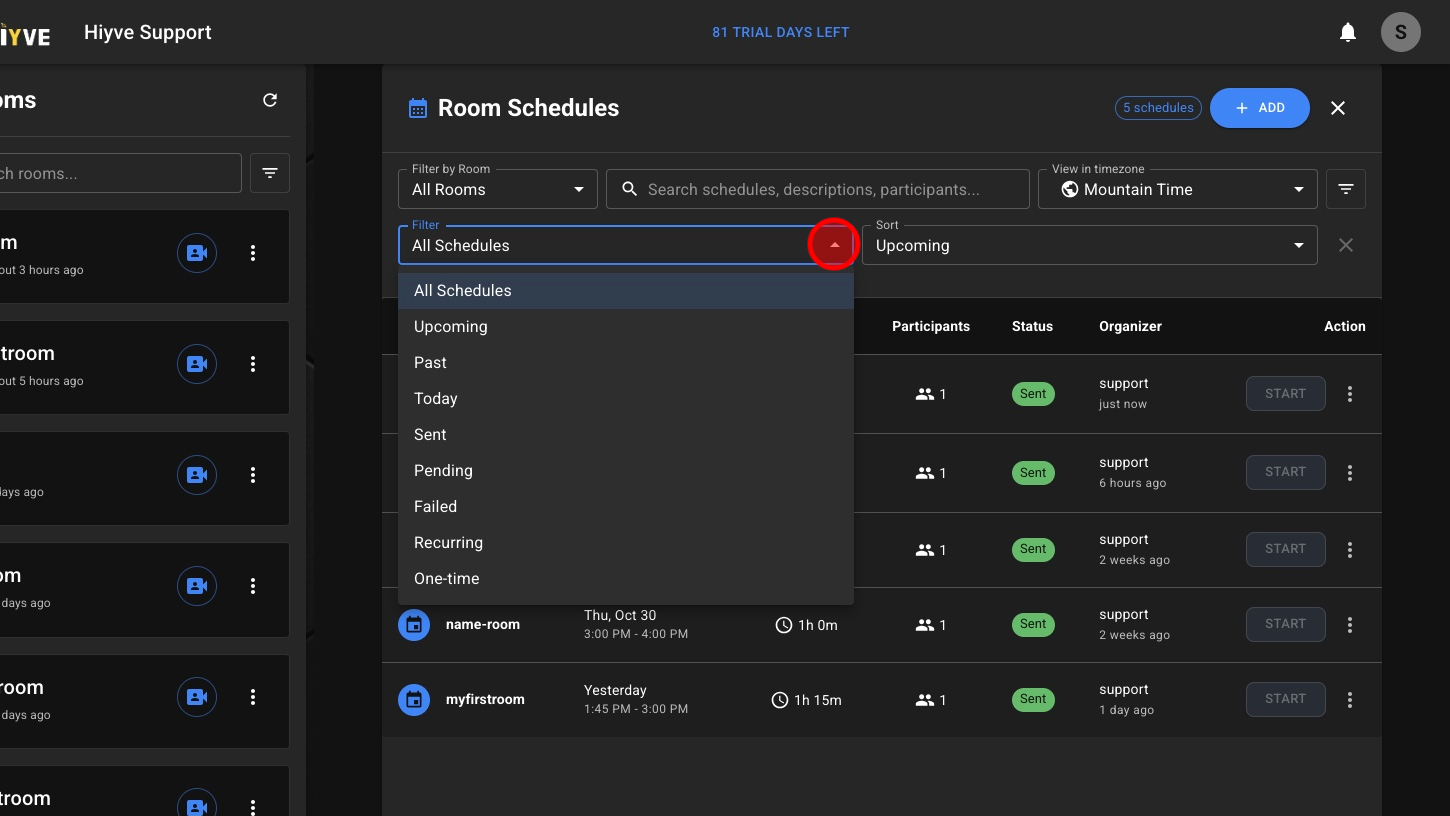
28. Filter Event List
29. Filter Scheduled Events By “Type”
30. Sort Events
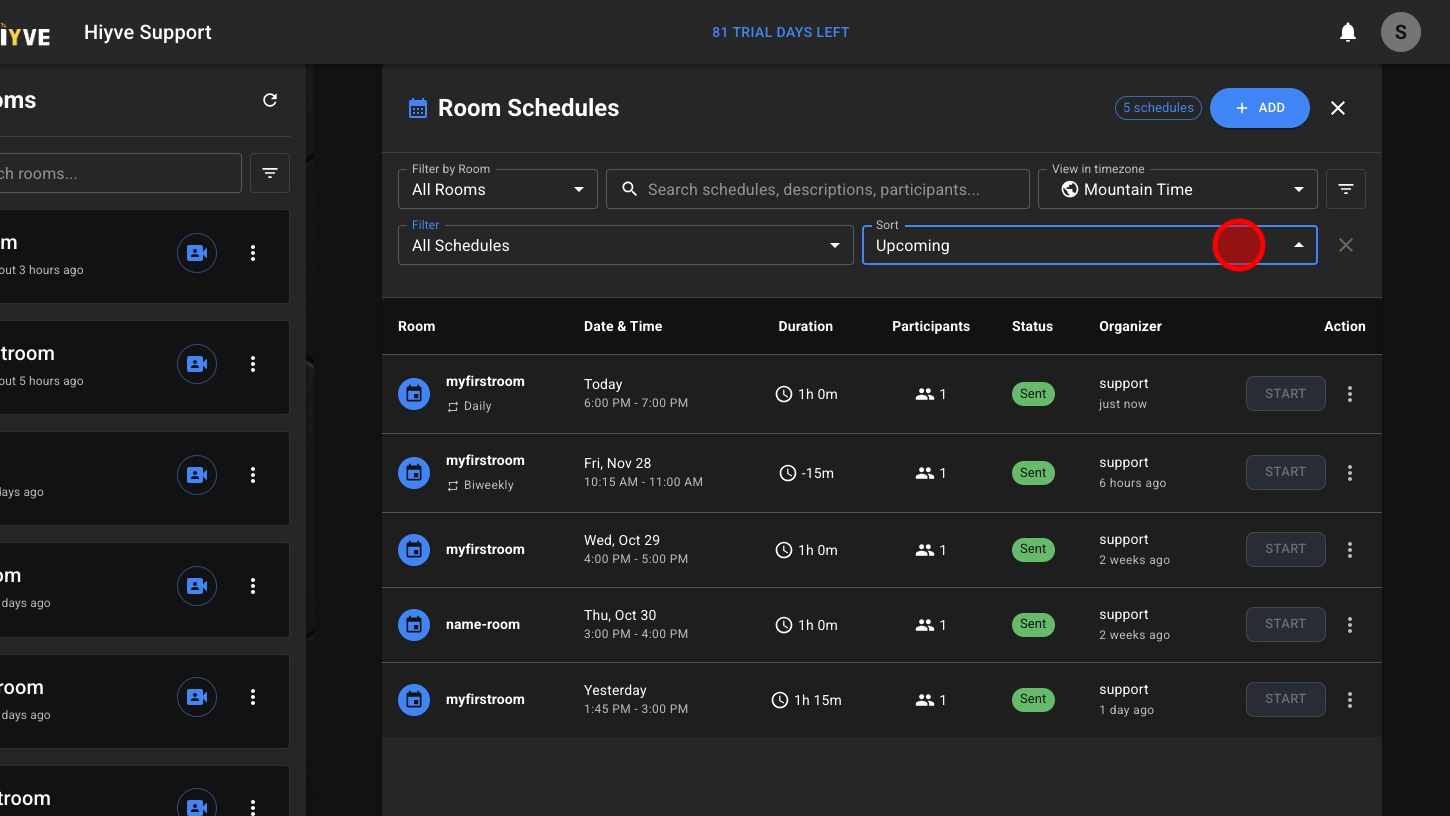
31. Sort By Upcoming Events, Date Created or Room Name
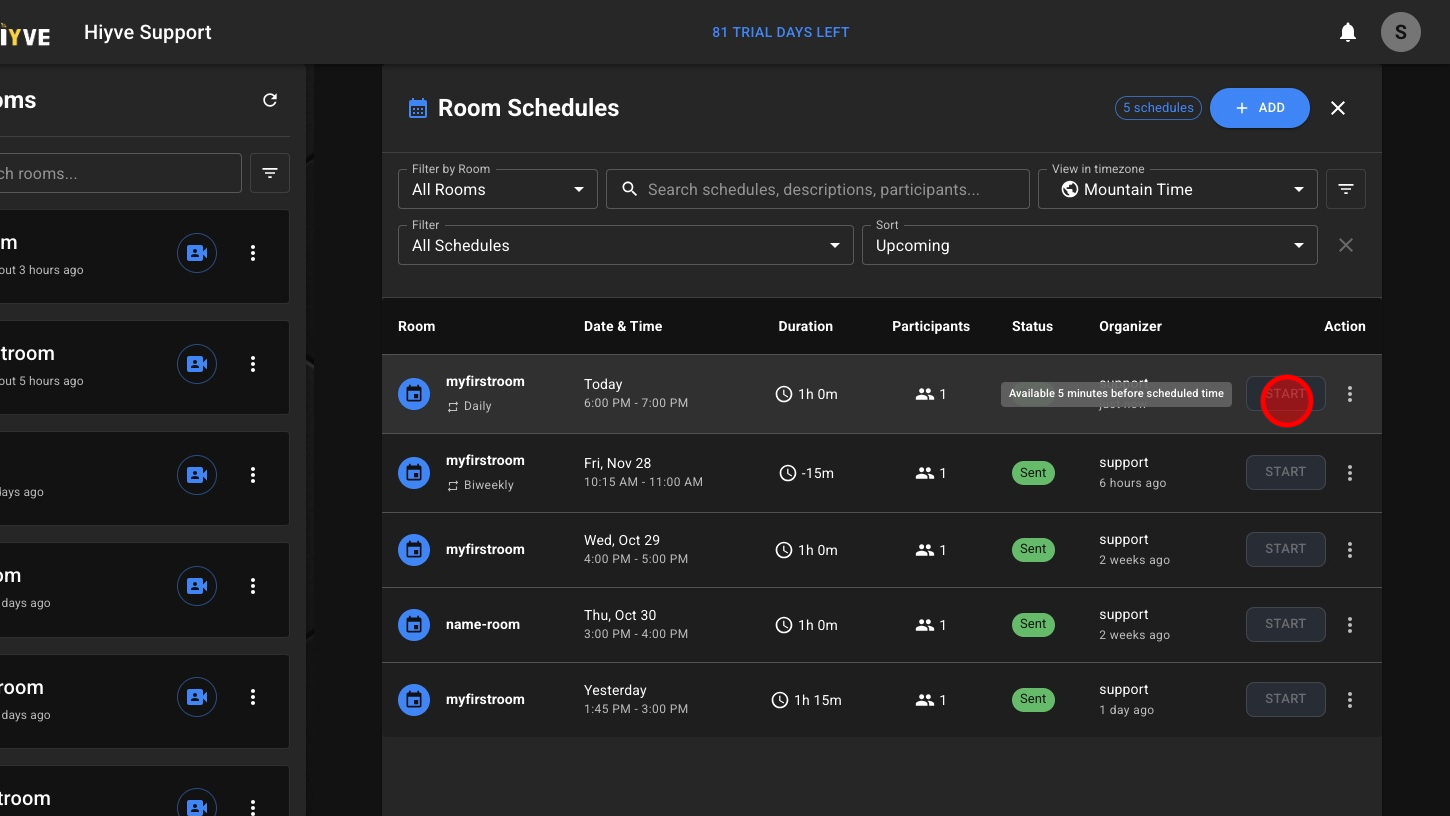
32. Events Can Be Started From The Schedule List
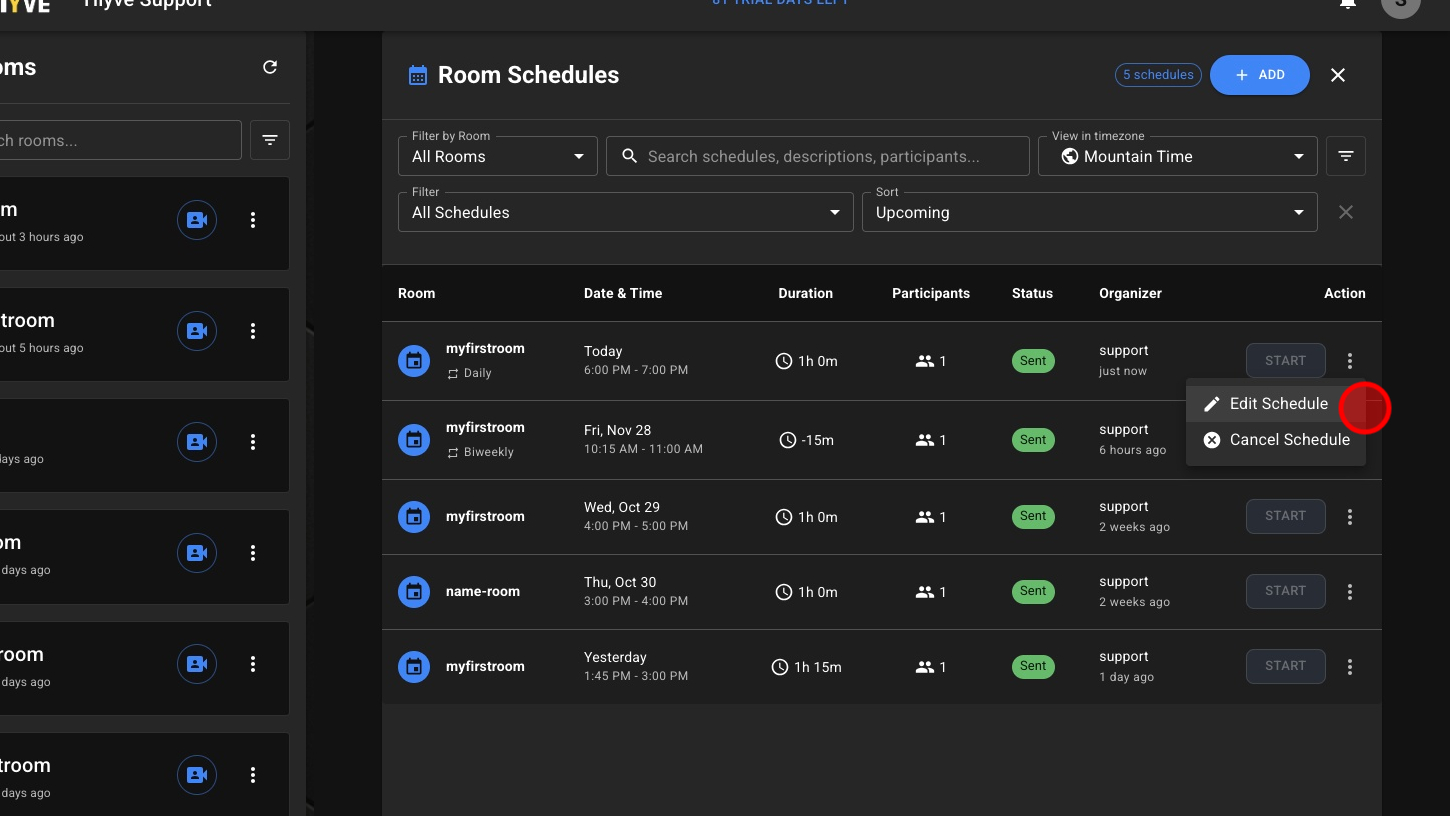
33. Edit or Cancel Events - Open The “Action” Menu

34. To Edit Your Event, Click “Edit Schedule”
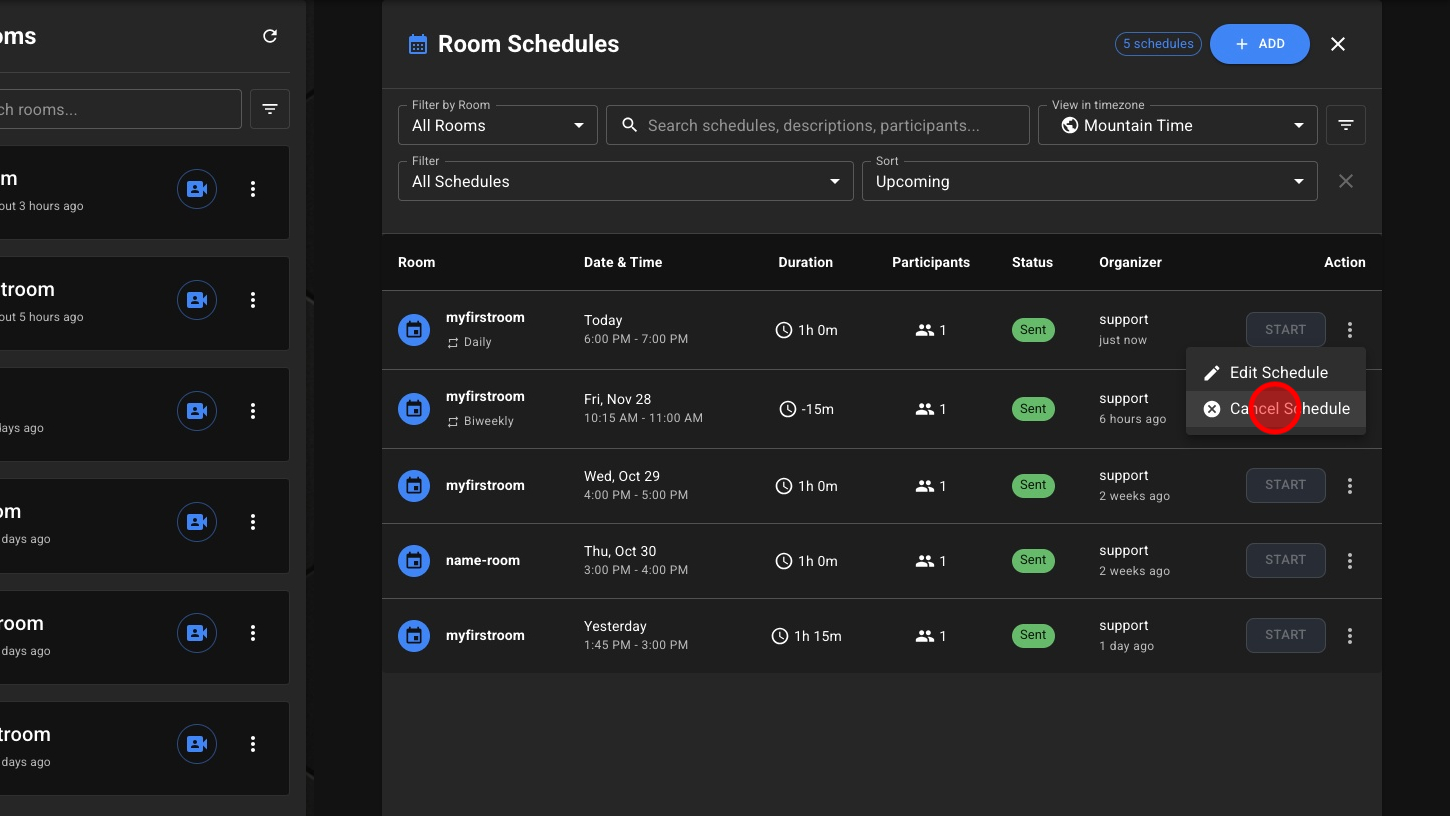
35. To Remove A Scheduled Event, Click “Cancel Schedule”
36. Click “Cancel Schedule”